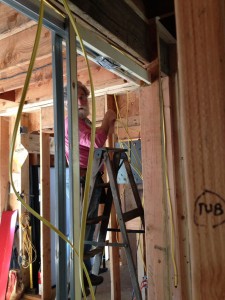
Today I had three major milestones happen: the cottage passed plumbing inspection, mechanical inspection, and electrical inspection. The last one was the most stressful, in part because the electrical end of things is far more complicated, and also the electrical code is three times as thick as the mechanical and plumbing codes put together. Meaning, that I don’t know all there is to know about it, and there are bound to be some goofs. Keep in mind, that’s much of why I’m doing this: architects are supposed to know all the building codes pretty well, which is quite a challenge.
The electrical inspection is actually a RE- inspection as a result; I failed the first time. The inspector was fairly lenient on me, since it’s an owner-build project, but the items he marked on his noncompliance form were:
- No more than four conductors in a 22 cubic inch wall box. Duh, I should have known that. It was an easy fix.
- Kitchens have to have two separate circuits in them, and bathroom circuits can’t serve other parts of the house. Didn’t know that, but then again, I’m mostly a commercial architect and that never comes up in commercial jobs.
- You have to have an outdoor plug on the front AND the back of the house. That one was annoying to fix, as I had to tear off some siding on the back of the house.
- No more than four conductors per structural hole. That one makes no sense to me at all, but he showed me a silly fix that meets the requirements of the code. For a 3″ hole with 8 wires in it, you separate them into two groups of 4, and drive a wooden shim between them… thus, two separate holes. The holes are not round, they are semicircular, but the code is not specific about that. Huh.
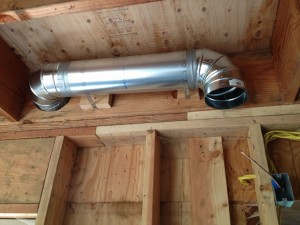
- The conductors between solar panels and switchgear have to be in metal conduit. This one gave me a heart attack, as that’s a very expensive wire to tear out, and HOW THE HECK AM I GOING TO GET A PIECE OF STEEL CONDUIT THROUGH ALL THOSE JOISTS? Turns out, you can do it in flexible metal conduit- it looks like a big aluminum esophagus. Took a day to tear out and reinstall, but only cost me about $150.
So, mission accomplished: I learned some stuff!
Now we are at the point where we can legally put in insulation. Yay! However, there remains one little problem… the roof. I still haven’t received the ridge caps, and installing insulation with an incomplete roof is taking a gamble. Despite months of me badgering the roof manufacturer and them being lame and making up excuses, they still have not sent my stuff. I am at a loss for the best way to take this to the next level. Though, I did discover this morning that they have a facebook page. And it even has the gall to show MY roof, in its incomplete glory! ChickenBrian said I should start getting friends to comment on the page about how they’d like to see a completed picture of the roof. Nice idea! Please feel free to do so, you’d be doing me a real one. Maybe in the next post, I will recount the entire sordid tale of the roof and its related fiascos. It has been, by far, the single most problematic part of this entire construction project.

